Once you have finished adding and updating your shift profiles, you're ready to begin creating and publishing the schedule.
Important things to note:
Making changes or updates to an existing shift profile will not update or edit existing schedule items. Any changes made to shift profiles will only be reflected when creating a new schedule or by reprocessing the existing schedule.
When deleting and recreating a schedule, only timeoff requests will be restored. Any other changes requests such as shift pick up requests and shift swaps will need to be manually added back to the new schedule.
Getting Started:
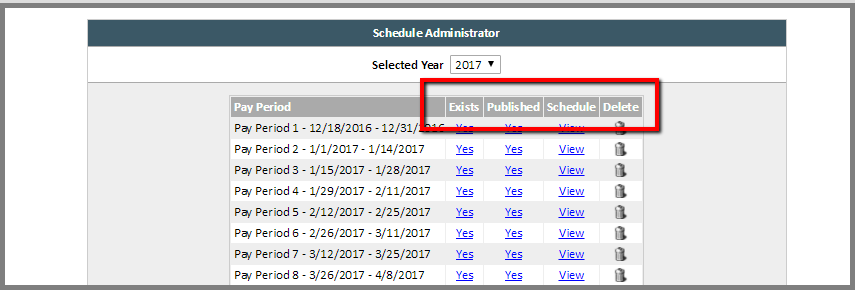
To begin creating the schedule you will first navigate to ePro Scheduler > Scheduling Admin > Schedule Setup.
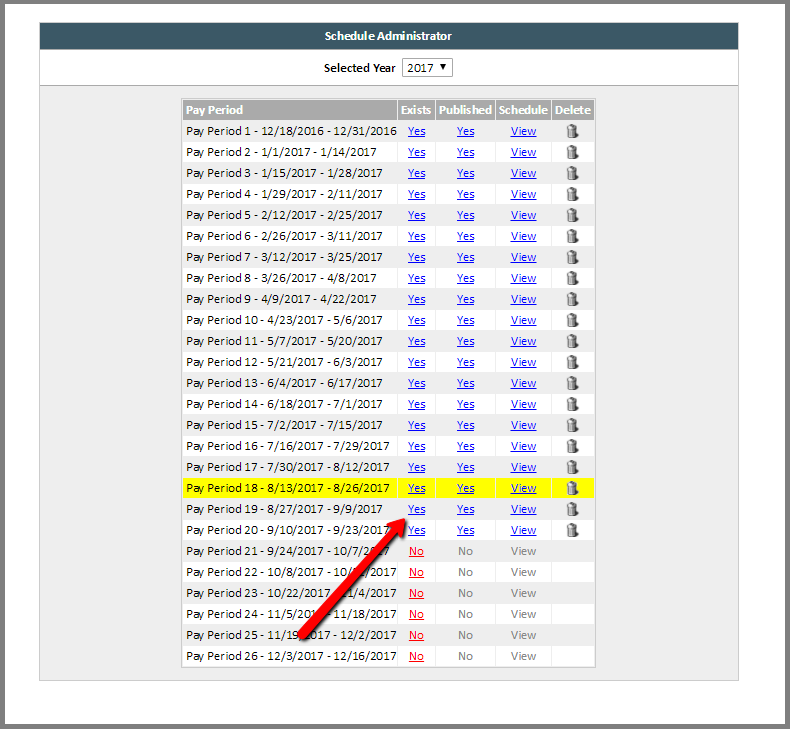
Here you will see a list of pay periods within a selected year. For each pay period you can see if the schedule has been created and if it is available to view by basic users.

Each column item also allows you to take different actions for each pay period.
- The 'Exists' column both shows if the schedule has been created for a specific pay period and by clicking on the hyperlink of either the 'Yes' or 'No' status allows you to create or reprocess the schedule.
- The 'Published' column both shows if the schedule has been made visible for basic users and by clicking on the hyperlink of either the 'Yes' or 'No' status, allows you to change the visibility settings for a pay period.
- The 'Schedule' column provides a quick link to the schedule if it exists for a pay period.
- The 'Delete' column gives access to delete the existing schedule by using the trash can icon.
- The Yellow highlighted row indicates the current pay period you are in.
Creating the Schedule:
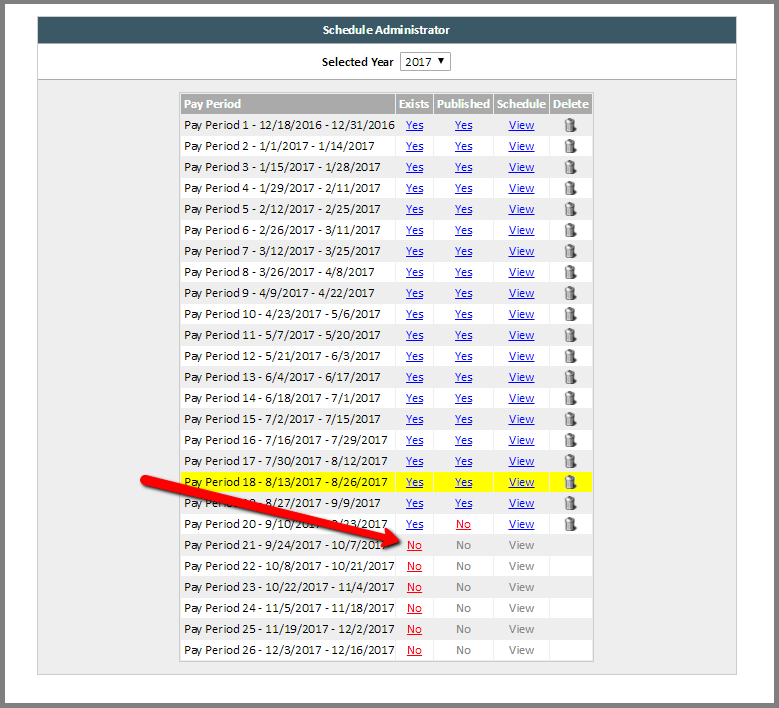
To begin creating a schedule you will click on the red 'No' under the exists column.
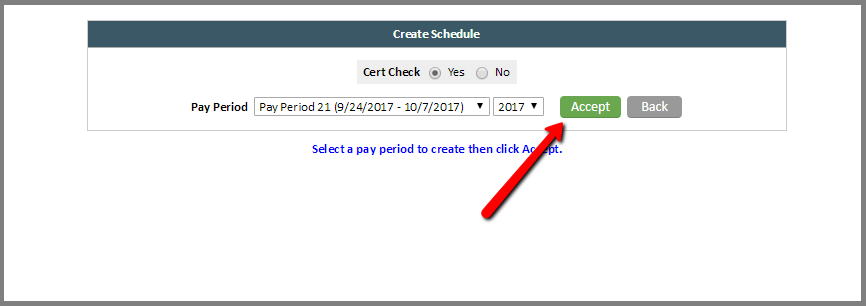
This will bring you to the 'Create Schedule' page where you can choose to create the schedule. From this page you can choose to either check for expired certifications or not by choosing the 'Yes' or 'No' radio buttons.
Once you have confirmed the pay period you are ready to create the schedule by clicking the green 'Accept' button.
You will be prompted to confirm. To do this you will choose the green 'Confirm' button.

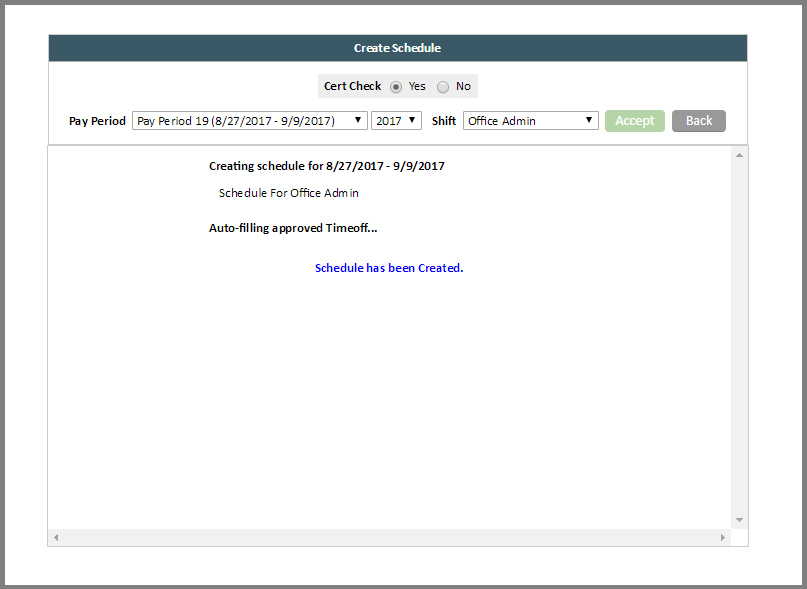
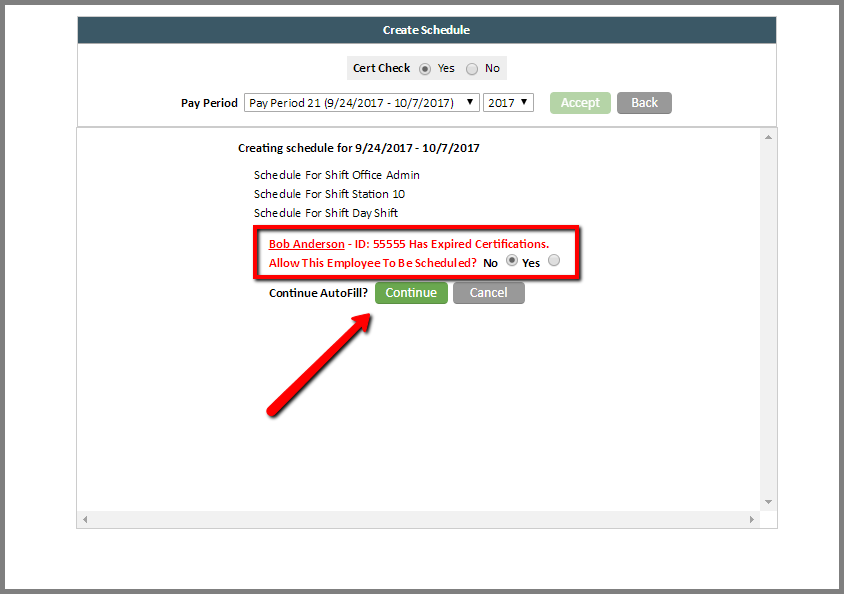
Once you confirm, the schedule will begin processing any expired certifications, scheduling conflicts, approved timeoff requests, approved shift pick up requests, and approved shift swap requests.
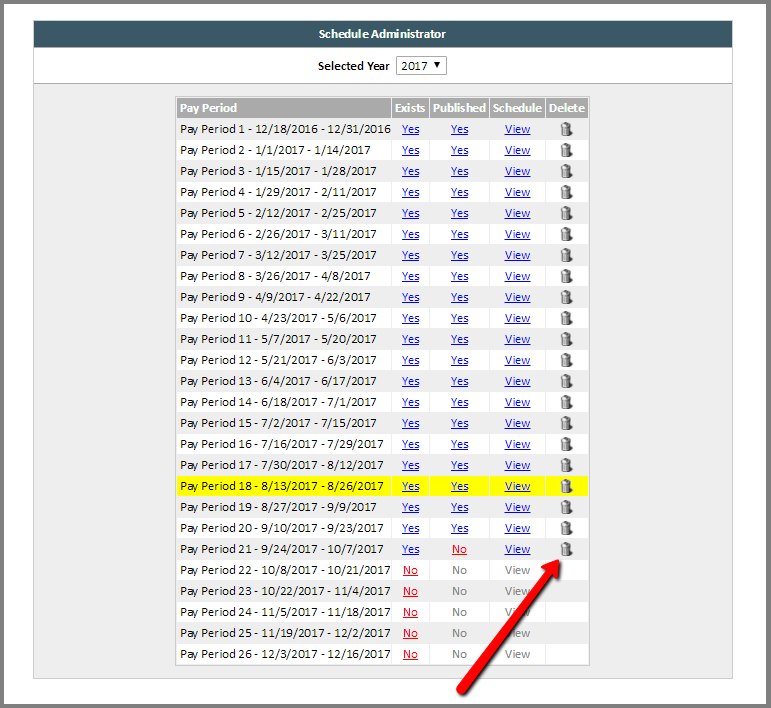
When this has completed, any issues found will be listed in red text along with a blue message stating that the 'Schedule has been Created.'

The next step will be to update the visibility settings for the pay period you have just created. You will update this by clicking on the red 'No' in the 'Published' column.

This takes you to the Publish Schedule page. Here you can confirm the pay period you would like to update as well as select the radio button for 'Viewable By Scheduler Only' or 'Viewable By Employees' options. You will then click the green 'Set Visibility' button.

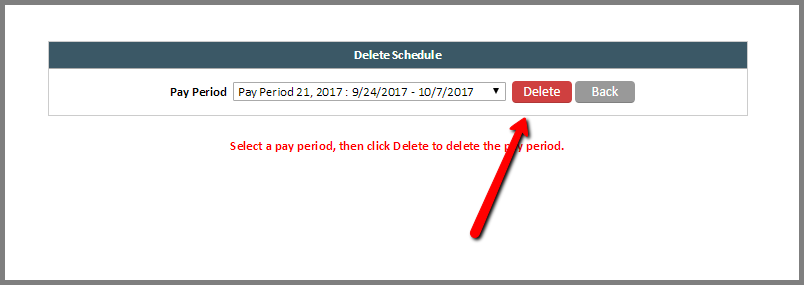
Anytime you need to delete an existing schedule, you will do this by clicking the trash can icon under the 'Delete' column.
This will take you to the Delete Schedule page where you can choose the pay period you need to remove and then click the red 'Delete' button.
Reprocessing the Schedule:
Anytime you make new shift profiles or add new shifts to a profile, you may need to reprocess an existing schedule in order to have the new items properly show up on the schedule.
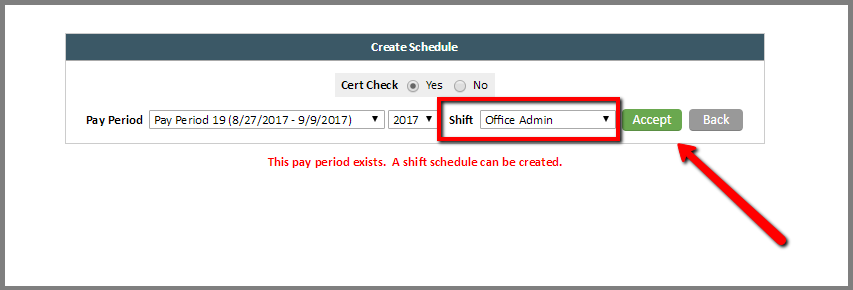
To begin repossessing an existing schedule you will choose the blue 'Yes' option for the specific pay period.
This will take you to the Create Schedule page. You will notice the 'Shift' drop down option is now available for existing schedules that wasn't previously available. Here you can choose the shift profile that was recently added or updated and then click the green 'Accept' button.
You will be prompted to confirm. To do this you will choose the green 'Confirm' button.

Once you confirm, the schedule will begin processing any expired certifications, scheduling conflicts, approved timeoff requests, approved shift pick up requests, and approved shift swap requests.
When this has completed, any issues found will be listed in red text along with a blue message stating that the 'Schedule has been Created.'
In the instance that the system comes across an employee with an expired certification, you will be prompted to allow the employee to be scheduled or not by choosing the 'Yes' or 'No' radio buttons and then clicking the green 'Continue' button.
Comments
0 comments
Article is closed for comments.