Whether you are adding a new shift to your schedule, or updating an existing one, making changes to your shift profiles can be completed quickly and easily.
Important things to note:
Making changes or updates to an existing shift profile will not update or edit existing schedule items. Any changes made to shift profiles will only be reflected when creating a new schedule.
Getting Started:
There are a couple ways to access your staffing templates depending on your needs or preferred workflow.
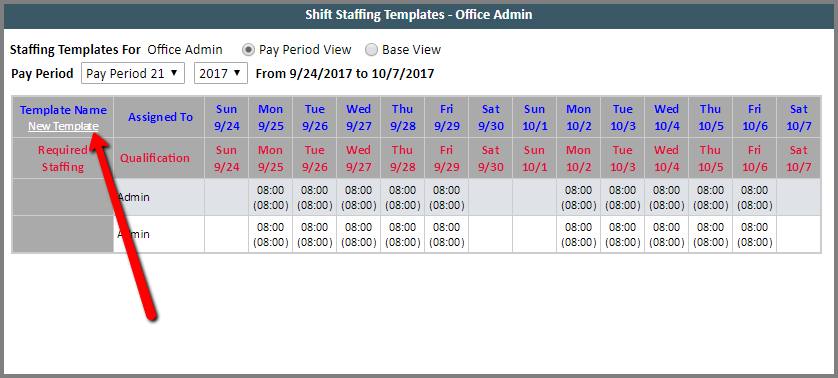
The first way is by navigating to ePro Scheduler > Scheduling Admin > Staffing Templates > Add Template.
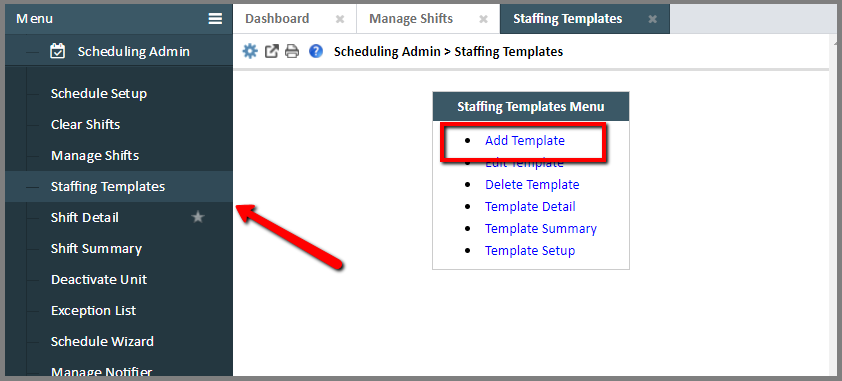
This will take you to a blank staffing template where you can begin updating and filling out the specific schedule information for a particular rotation or employee.
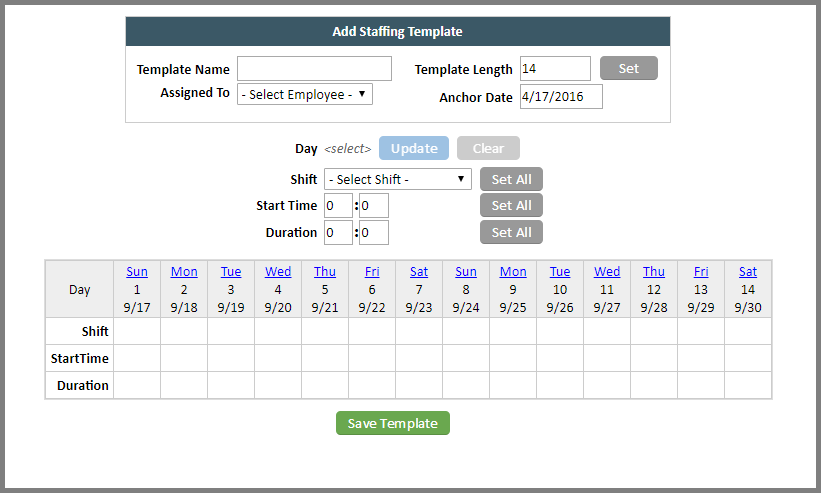
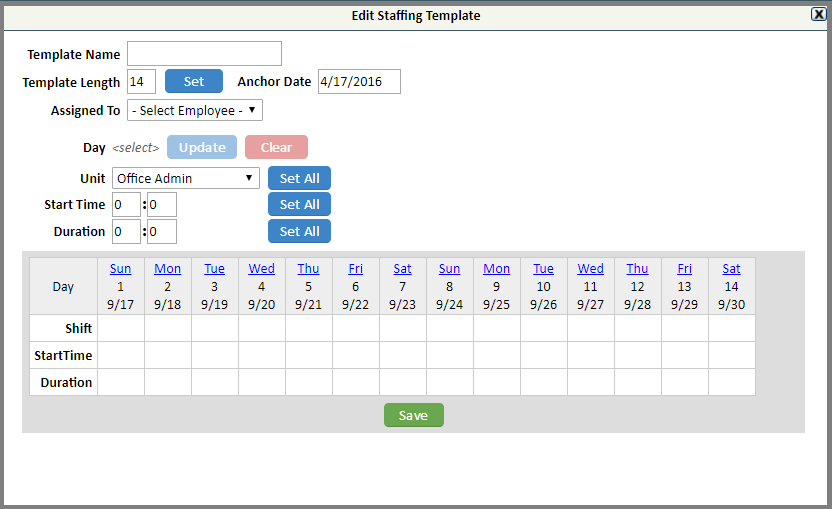
- The 'Template Name' field allows you to name the template after either the rotation, shift, or employee. This should be something easily understandable by your scheduler.
- The 'Assigned To' drop down allows you to assign a specific employee from your active employee list.
- The 'Template Length' field allows you to set the template or rotation length for the shift.
- The 'Anchor Date' field should match the anchor date listed in the shift profile.
- The 'Shift' drop down allows you to assign the specific shift profile for each day in the template.
- The 'Update' button will update changes in the day fields at the bottom.
- The 'Clear' button will clear out any information in the fields for a specific day chosen.
- The 'Start Time' field allows you to enter the shift start time.
- The 'Duration' field allows you to enter the duration of the shift.
- The 'Set All' button allows you to update all existing template days with that specific information listed.
- The 'Save Template' button will be the last step you take after making all changes to the staffing template.
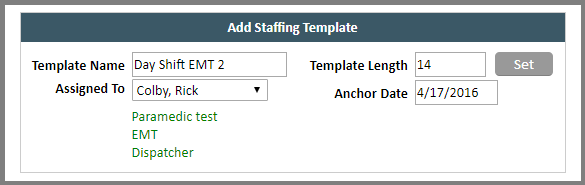
To begin, you will first add the Template name, Assigned Employee, Template Length, and Anchor Date. If the template length is different from the default 14 auto populated, you will need to click the grey 'Set' button. Once you do this, the page will refresh with the new template length.
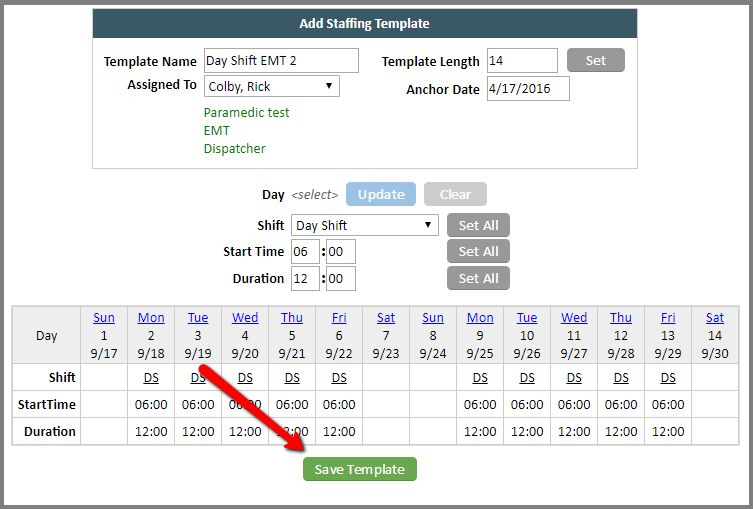
Next you will begin updating the days the employee will work. To do this you will click on the blue link of the day of the week.
Next you will assign the Shift, Start Time, and Duration for the day you selected then click the blue 'Update' button.
You will do this for each day the employee should work.

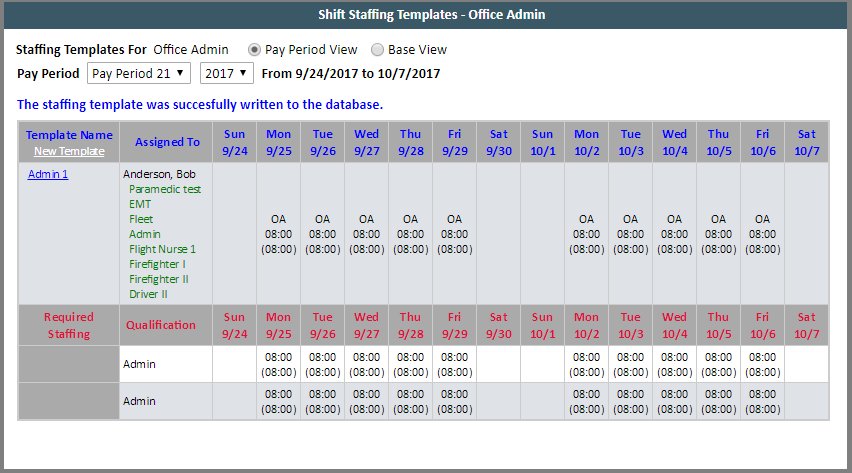
Once you have finished updating each day the employee works, you will click the green 'Save Template' button at the bottom of the page.
Additional Staffing Template Options:
Once you've finished creating new Staffing Templates, you may find you need to update existing templates or even delete those that will no longer be needed. To do this you will navigate back to the main Staffing Template menu.
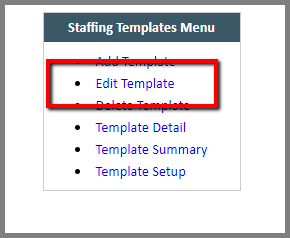
To edit an existing template you will choose the 'Edit Template' link.
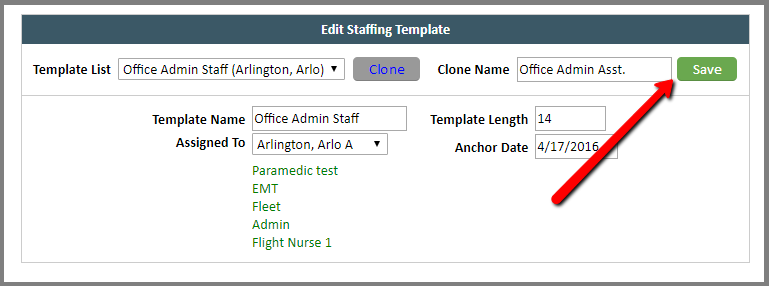
Here you will choose the template from the drop down menu that needs to be updated.
From here, you can make any changes needed, including cloning the template. To do this you will click the grey 'Clone' button.

This will enable the 'Clone Name' field where you can enter the new template name and then click the green 'Save' button.
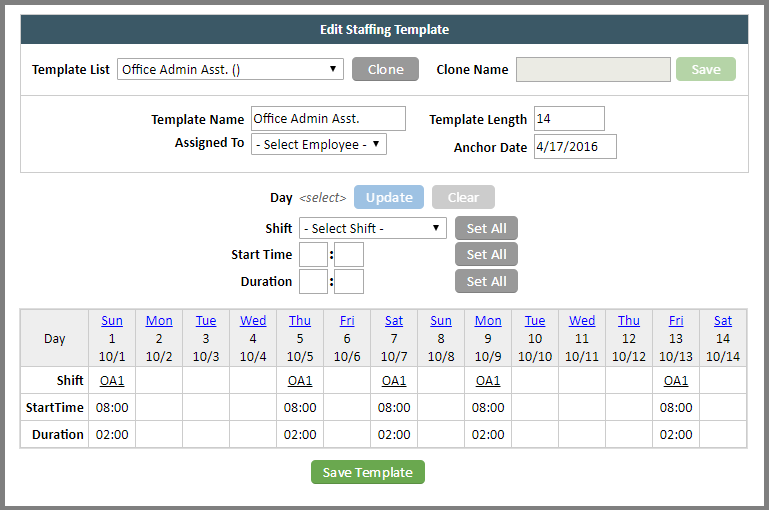
Here you can make any changes or updates to your cloned template and then click the green 'Save Template' button.
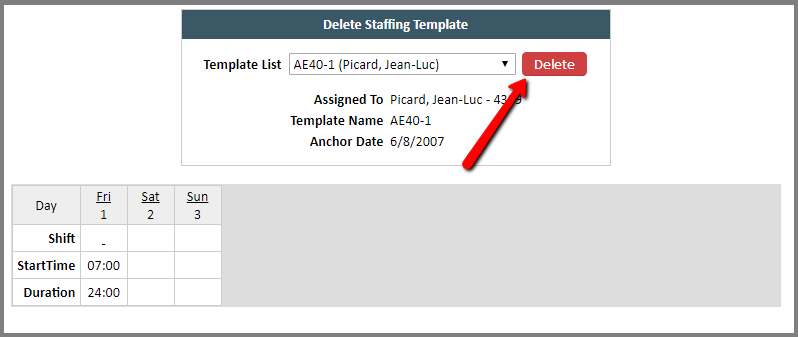
Next you have the option to delete an existing template.
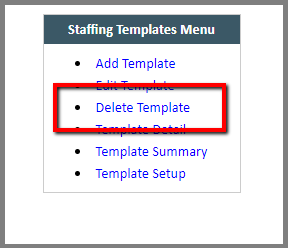
This will take you to a page where you can choose the template from the drop down menu that you no longer need and then click the red 'Delete' button.
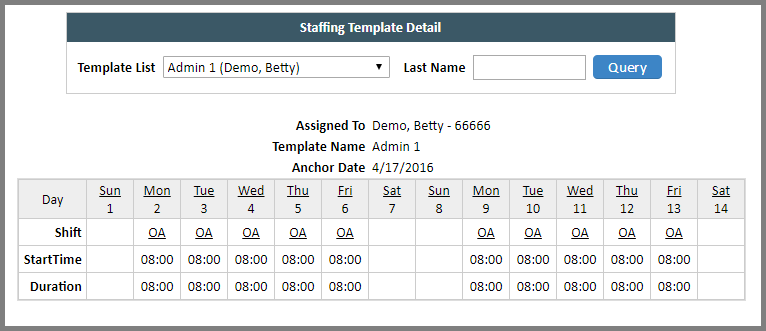
If you would like a simple view of a specific Staffing Template, you will choose the Template Detail page.

Here you can see the name, employee, and schedule information for a template in a clean simple view.
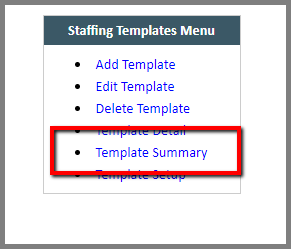
If you need to view a quick summary view of all your available templates, you will choose the Template Summary page.
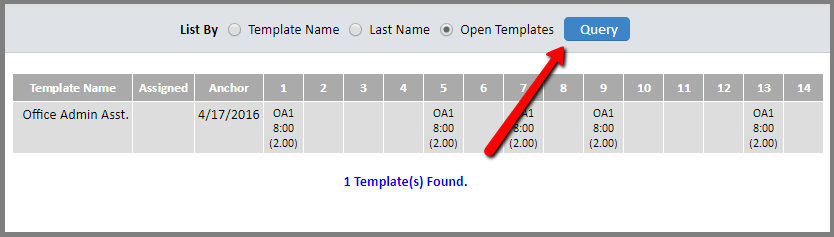
Here you are given several radio options for the summary view. In our example below, we chose the 'Open Templates' option so that we could see a quick list of all templates that have not been assigned to an employee.
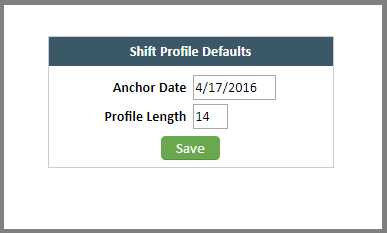
If you need to update the default settings for your Staffing templates, you can do this by choosing the Template Setup page.
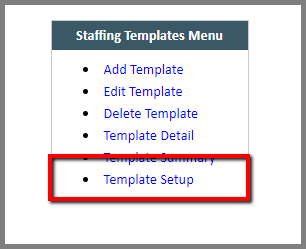
This will allow you to set the default Anchor date and Template length. For more information on anchor dates, you can check out this helpful support article.
Helpful Tips and Tricks:
You can access Staffing Templates that have already been created and connected to a shift profile within the profile.
To do this you will first navigate to ePro Scheduler > Scheduling Admin > Manage Shifts > Manage Shift Profiles.
Next you will select the shift profile from the drop down list to open it. Here you will see the blue 'Staffing Templates' link on the right hand side of the profile.
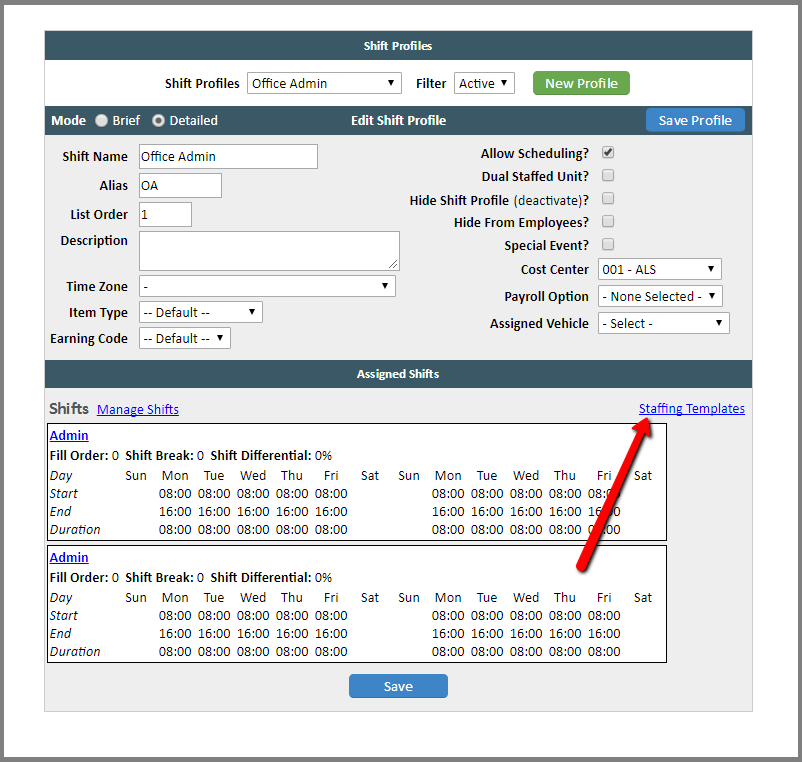
This will open a new window showing all Staffing Templates currently connected to this specific shift profile. This is a great way to check that the template start times and duration match up to the shift times.
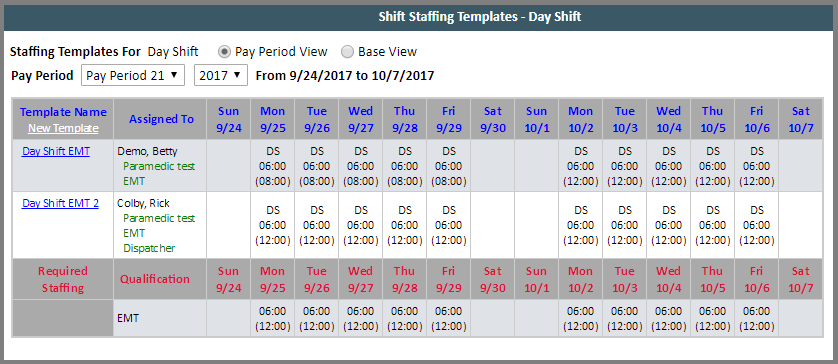
You can also create new Staffing Templates from this window by clicking the white 'New Template' link shown below.
This will open a new blank staffing template form. The fields are the same as before, but since it opens in it's own window, they are arranged differently.
You will follow the same steps to create the new template and then click the green 'Save' button when finished.
This will take you back to the first window where you can compare the new staffing templates with the shift profile.
Comments
0 comments
Article is closed for comments.